Successful Practice Secrets Funnel Template Guide
Follow this guide to customize this funnel template!
What's included in your funnel
Your funnel has 8 pages:
(Click each button to jump to section)
What Guides To Watch
To help you navigate the website builder, we recommend that you go through the following guides:

How The Funnel Works
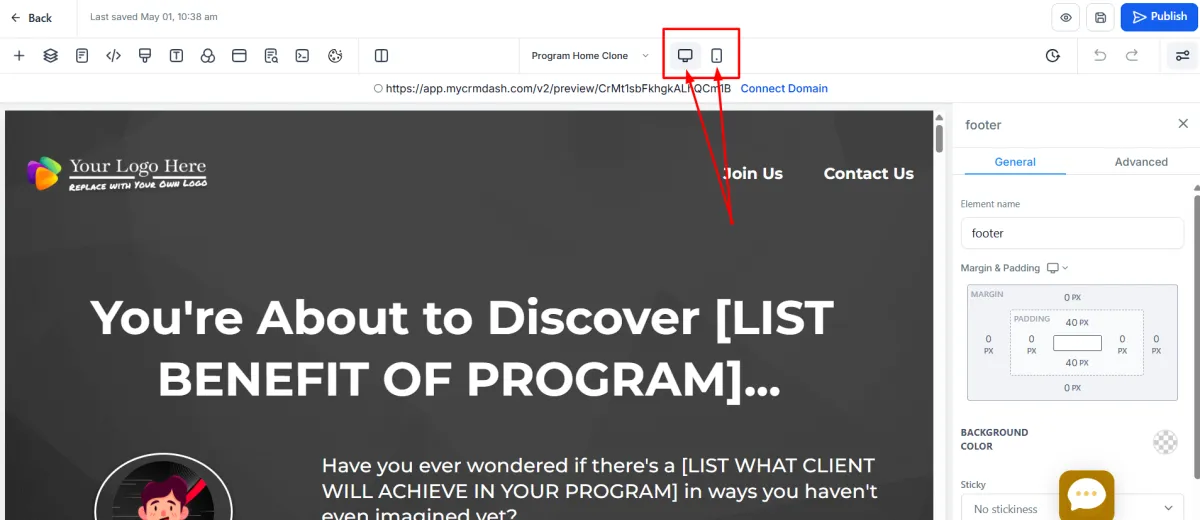
The following sections lists down all the things you need to understand and prepare before working on your funnel. Note that there's a mobile version of each page in the funnel. To ensure your funnel pages look their best on mobile, we decided to SEPARATE the mobile section elements from the desktop version.
All of the desktop sections are hidden in the mobile view, as the mobile sections are hidden in the desktop view.
If you add new elements, those sections need to be added to the mobile view as well because the whole section (containing that element) in desktop is hidden in the mobile view.
By default, you're looking at the desktop view in the funnel builder page, toggle over to the mobile view to see all the elements you need to edit.
Funnel Pages:
Lead Magnet Opt-in Page - Captures visitor information by offering a valuable free resource
Tripwire Sales Page - Presents an affordable, low-investment product to convert leads into customers
Tripwire Checkout Page - Provides a payment form to complete the initial purchase
One-Time Offer (OTO) Page - Creates an exclusive opportunity to upgrade to your premium course offering
Thank You Page - Delivers access instructions and outlines next steps to ensure customer success
Core Offer Return Order Form - Serves as a dedicated checkout page for email follow-up campaigns
Confirmation Pages - Includes two separate confirmation pages to acknowledge different purchase paths
Each step plays a strategic role in moving prospects through your value ladder while providing multiple opportunities for conversion.
The Successful Practice Secrets Funnel is a lead magnet funnel with seven distinct steps designed to guide potential clients from initial interest to purchase. In the funnel builder, each page is referred to as a "Step," making it easier to understand your position in the creation process. Here's what each step in your funnel accomplishes:
Step 1: This is where your funnel journey begins - the Lead Magnet Opt-in Page. This crucial first impression offers visitors a valuable free resource in exchange for their contact information. When visitors click the call-to-action button, a convenient pop-up form appears, allowing them to quickly provide their details and gain access to your lead magnet.
Step 2: After visitors submit their information on the Lead Magnet Opt-in Page, they're automatically directed to the Tripwire Sales Page - your opportunity to convert leads into paying customers.
They will immediately see a video playing. This video should give them a walkthrough about your low-cost tripwire offer.
This page features a strategic engagement element: an invisible countdown timer set for one minute. During this brief waiting period, the page content builds value and anticipation for your low-cost tripwire offer.
When the countdown completes after 60 seconds, the "Add to Cart" button automatically appears on the page. This timed approach gives visitors enough time to understand your tripwire's benefits before making a purchase decision.
Once visitors click the "Add to Cart" button, they proceed seamlessly to Step 3 - the Tripwire Checkout Page - where they can complete their initial purchase and continue through your value ladder.
Important: The featured video is a key engagement element on this page.
You'll need to replace the placeholder video with your own custom content that introduces your practice and explains the value of your lead magnet. A well-crafted video significantly increases conversion rates by building trust and clearly communicating your offer's benefits.
[ Read: Video Element for Funnels and Websites ]
[ Read: Minute Timer ]
Step 3: The Tripwire Checkout page is where they pay for your tripwire offer. The user needs to enter their payment information. The page is intentionally focused on completing the transaction with minimal distractions to maximize conversion.
Once payment is successfully processed, the system automatically advances the customer to Step 4 - the Core Offer One-Click Upgrade Page. This seamless progression is strategically timed when customer buying psychology is most favorable, creating the perfect opportunity to present your premium offering.
Step 4: This step presents your premium Core Offer through an engaging One-Click Upgrade Page. This critical conversion point features a persuasive video that showcases the enhanced value of your main course offering, positioned at a higher price point than the tripwire product.
Similar to the Tripwire Sales Page, this page employs a strategic one-minute countdown timer. When the timer reaches zero, three distinct call-to-action buttons appear:
One-Click Upsell Button - This primary CTA enables customers to purchase your core offer instantly using their already-entered payment information. This frictionless purchase option significantly increases conversion rates by removing additional checkout steps.
"Click here to pay with another card" - This secondary option gives customers flexibility if they prefer to use different payment details.
"No" - This button provides an exit path for customers who aren't ready for your premium offering.
Step 5: This takes your customer to the Order Confirmation Page, which serves as a transaction receipt and validation of their purchase. This page dynamically displays different content based on the customer's previous choices.
If the customer clicked the One-Click Upsell button on the previous page, they'll see a comprehensive confirmation that includes both their initial tripwire purchase and their core offer upgrade. This reinforces the value of their complete investment.
Alternatively, if the customer clicked the "No" button to decline the core offer, they'll still reach the Order Confirmation Page, but it will display only the tripwire product they purchased. This ensures all customers receive proper confirmation regardless of their purchase decisions.
Step 6: This step activates when customers choose CTA button to "Click here to pay with another card" on the One-Click Upgrade Page. This alternative checkout path provides flexibility for customers who want your core offer but need to use different payment details.
The Core Offer: Return Order Form Page features a complete payment form where customers can enter new card information to purchase your premium offering. This dedicated checkout page maintains the persuasive elements of your core offer while providing a secure transaction environment.
After successfully entering their payment details and completing the purchase, customers are automatically directed to the
Core Return: Order Confirmation Page, which validates their transaction and provides access instructions for their newly purchased core offer.
Step 7. After their purchase, they will see the Thank You Page, which customers reach by clicking the "Members Only Access" button from any of the previous confirmation pages. This page serves as the final destination in your funnel journey.
The Thank You Page plays several important roles:
It officially welcomes customers to your program or service
It provides clear instructions on how to access the purchased content
It offers guidance on next steps to help customers get the most value from their purchase
It may include bonus resources or additional support options
This page is strategically designed to ensure a smooth transition from buyer to engaged customer by providing all the necessary information for them to start using what they've purchased right away. The Thank You Page also represents an opportunity to set expectations, build excitement about the customer's decision, and potentially introduce additional resources or community elements that enhance their overall experience with your practice.
Successful Practice Secrets Funnel Template Guide
Follow this guide to customize this funnel template!
What's included in your funnel
Your funnel has 8 pages:
(Click each button to jump to section)
Page-by-Page Customization
Page 1: Lead Magnet Opt-in Page
This strategic entry page converts visitors into valuable leads by offering a free, high-quality resource that addresses their specific needs in exchange for their contact information. After they submit the form, the next page opens.
1. Header Section:
Replace "[TESTIMONIAL HERE]" with a compelling customer testimonial
Replace "Download This [FREEBIE TYPE]" with your specific lead magnet type (e.g., "Download This Free PDF Guide")
Replace "[ENTER BENEFITS]" with the key benefits of your lead magnet
When clicked, the CTA button will open the pop-up box that contains the opt-in form.
2. Replace Product Image and product description:
Upload your lead magnet mockup to replace "Your Product Here" image. You may use Content Amplifier to create your product image
Ensure image has transparent background for best results
Change headline and subheadline
Change the product benefits
3. Edit Testimonials:
Replace placeholder testimonials with actual customer reviews
Update testimonial names and images
4. Customize the pop-up box:
Change the colors according to your branding
5. Edit Form Fields:
Customize form's custom fields if additional information is needed. Edit form questions from the Form builder (Sites > Form > Builder> SPS Funnel Lead Magnet Optin Pop-Up Form)
6. Update Call to action buttons:
Replace "[FREEBIE TYPE]" with your specific lead magnet type page
Page 2: Tripwire Sales Page
This page presents your tripwire offer (low-cost entry product) with compelling benefits that motivate leads to make their first purchase.
1. Video Section:
Replacethe video with your own
Adjust the time on the minute countdown timer element
2. Edit the product's price on the CTA button
Replace "Click Here to Add to Cart: Just $7" with the correct pricing
Page 3: Tripwire Checkout Page
This page is where your prospects pay for the tripwire offer.
The checkout page contains a checkout form where people can enter their payment information. Make sure you have added the correct product to this page.
[ Read: How to create a product ]
[ Read: How to add a product to a funnel page ]
1. Edit the Order Form:
Ensure all necessary fields are included
Set required fields appropriately
2. Add the correct product
3. Edit the "Here's What You'll Get" section:
Edit the content under the featured section
Page 4: Core Offer: One-Click Upgrade Page
This page presents your premium course offering as a time-sensitive opportunity, encouraging people to buy immediately. Just like the Tripwire page, this page contains a video element with the same function.
1. Header:
Keep the "WAIT!" attention grabber
Ensure "ONE TIME ONLY" messaging is prominent
2. Update Video Content:
Replace placeholder video with your upsell presentation
Ensure video is properly sized and mobile-responsive
Add captions if needed
3. Update the CTA Buttons:
Set "Upgrade My Order" button to correct price
Ensure one-click functionality works properly
Test payment processing
Page 5: Order Confirmation Page
This page confirms the customer's purchase details while providing clear instructions for accessing their newly acquired products.
1. Update Header:
Replace "Your logo here" with your company logo
2. Customize Confirmation Message:
Keep "Congratulations! Your Order is Complete!" messaging
Ensure order information displays correctly
3. Configure Order Summary:
Add the correct products to this page for the order summary
4. Update Resource Links:
Configure "Members Only Access" button to direct to your Thank You Page
Set up "Get Support" button to link to your support system
5. Edit Footer:
Replace "Your Company" with your business name
Verify copyright information is current
Page 6: Course Access Thank You Page
This page gives them access to all purchased courses and membership areas while guiding customers on next steps.
1. Edit Thank You Message:
The headline "Thank You for Your Order" can remain as is
Sub-headline "You Have Immediate Access to Your Courses" can be customized based on what you're providing access to
2. Edit Bookmark Reminder:
Keep the bookmark reminder text to help users return to this page
Consider adding any additional instructions specific to your course platform
3. Customize Access Instructions:
Update the instructions text if necessary
Ensure the spam/junk folder reminder is included
4. Configure Access Button:
Change "Click to Access Your Online Courses" text if needed
Link the button to your actual membership area or course platform
Test the link to ensure it works correctly
5. Update Footer:
Replace "[Your Company Name]" with your business name
Verify copyright information is current
Page 7: Core Offer Return Order Form
This page serves as the landing page for your follow-up email sequences for your Core Offer.
1. Edit Header:
Replace "Your logo here" with your company logo
Update support contact information "[YOUR PHONE OR EMAIL]"
2. Edit Product Information:
Replace "[YOUR PRODUCT NAME HERE]" with your product name
Replace "[SHORT PRODUCT DESCRIPTION]" with a concise product description
Update "100% 30-Day Satisfaction Guarantee" if your guarantee terms differ
3. Customize Features List:
Replace placeholder features with your product's actual features and benefits
Ensure the checkmarks display correctly
Add or remove feature items as needed
4. Edit Checkout Form:
Update product name "One-Click Upsell Product (SPS funnel)"
Set correct price ($9.00 in the template)
Configure coupon code functionality if needed
Ensure "No payment method available" message is replaced with actual payment options
5. Update Footer:
Replace "[YOUR COMPANY NAME]" with your business name
Verify copyright information is current
Page 8: Core Return: Order Confirmation Page
This page validates the customer's core offer purchase while providing clear access instructions and next steps to ensure they can immediately begin using their premium program resources. It's a copy of Page 5: Order Confirmation Page.
1. Update Header:
Replace "Your logo here" with your company logo
2. Customize Confirmation Message:
Keep "Congratulations! Your Order is Complete!" messaging
Ensure order information displays correctly
3. Configure Order Summary:
Add the correct products to this page for the order summary
4. Update Resource Links:
Configure "Members Only Access" button to direct to your Thank You Page
Set up "Get Support" button to link to your support system
5. Edit Footer:
Replace "Your Company" with your business name
Verify copyright information is current
Automation
To fully customize this funnel template, you have to customize the following automations.
Successful Practice Secrets Funnel Folder - This workflow folder contains all three automations we’ve set up to support the Successful Practice Secrets Funnel. To go here click on Automation >> Successful Practice Secrets Funnel

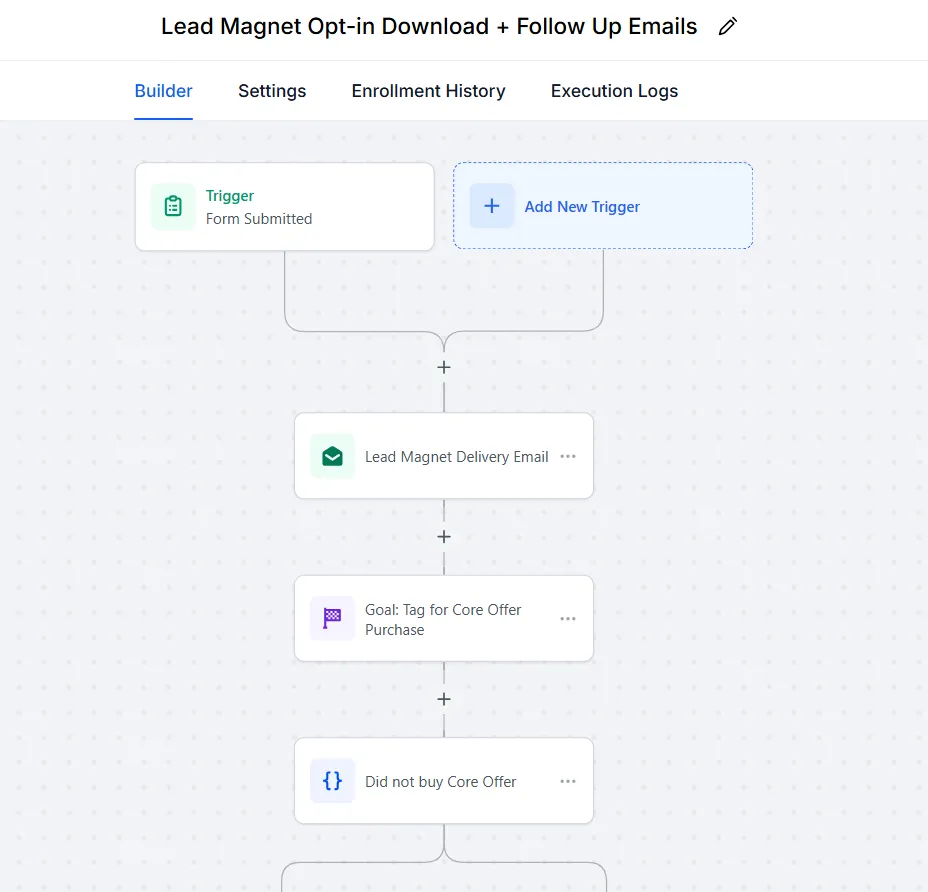
Lead Magnet Opt in Download + Follow-up Emails - This automation is triggered when someone opts-in/enters their contact information on the Lead Magnet Opt-in form. It currently has one email placeholder that delivers the lead magnet when they opt-in.
This workflow is also connected to the Follow-Up Emails for the Core Offer for those that did not buy it.
IMPORTANT: Click the + button to add an action. Ideally, you have several follow-up emails that invite people to go back to the funnel and buy your course offer. Make sure to use the link of the Core Offer: Return Order Form.
[ Read: Introduction to Workflows ]
Add tag after Core Offer Purchase - If they bought the Core offer, they will get the tag “Core Offer Purchase”. You may add one more tag with the specific name of your course offer. You do NOT need to tweak this workflow.
[ Read: Add Contact Tag Action ]

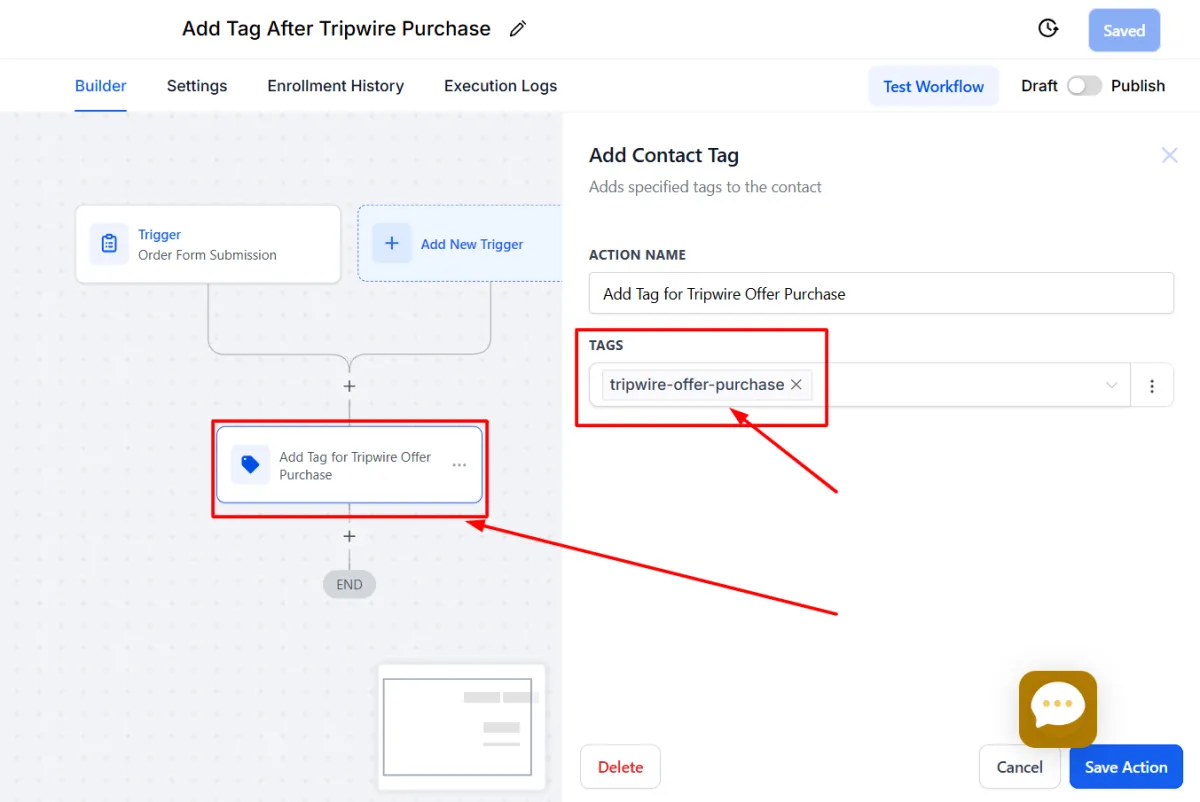
Add Tag After Tripwire Purchase - If they bought the Tripwire offer, they will get the tag “Tripwire Offer Purchase”. You may add one more tag with the specific name of your course offer. You do NOT need to tweak this workflow.
Troubleshooting
Common Issues
Payment Processing Issues
Verify Stripe connection status (or whatever payment provider you use)
Test the Deposit page by putting it on Test mode
Confirm correct currency settings
Form Submission Errors
Check form field validation settings
Test form with sample data
Email Delivery Problems
Verify email deliverability settings
Check sending domain authentication
Review email content for spam triggers
Mobile Display Issues
Test on multiple devices and browsers
Check mobile-specific elements
Timer Functionality
Verify timezone settings
Confirm end date format
Others
Choose the right keywords for each page where needed
Add your name on “Author”
Add an image fit for social media sharing for “Social Image”
Links and tags for custom meta tags and Canonical links (best done by an SEO Specialist if you have one)